Uganda Gorilla Trekking Photography Guide
Gorilla trekking in Uganda is one of the most rewarding wildlife photography experiences in Africa, offering rare, close encounters with mountain gorillas in the dense forests of Bwindi Impenetrable National Park and Mgahinga Gorilla National Park. Capturing these moments requires preparation, the right gear, and an understanding of jungle conditions. This guide focuses on gorilla trekking photography tips Uganda, helping you return with sharp, ethical, and powerful images.
Understanding the Photography Environment
Dense Forest and Low Light Conditions
Bwindi is a thick, high-altitude rainforest where light rarely penetrates fully. Even during midday, visibility remains low due to the canopy cover. This makes gorilla trekking photography tips Uganda heavily centered around low-light performance.
You will often shoot in shaded conditions with moving subjects. Fast adjustments and steady handling matter more than perfect composition.
Close Encounters but Limited Time
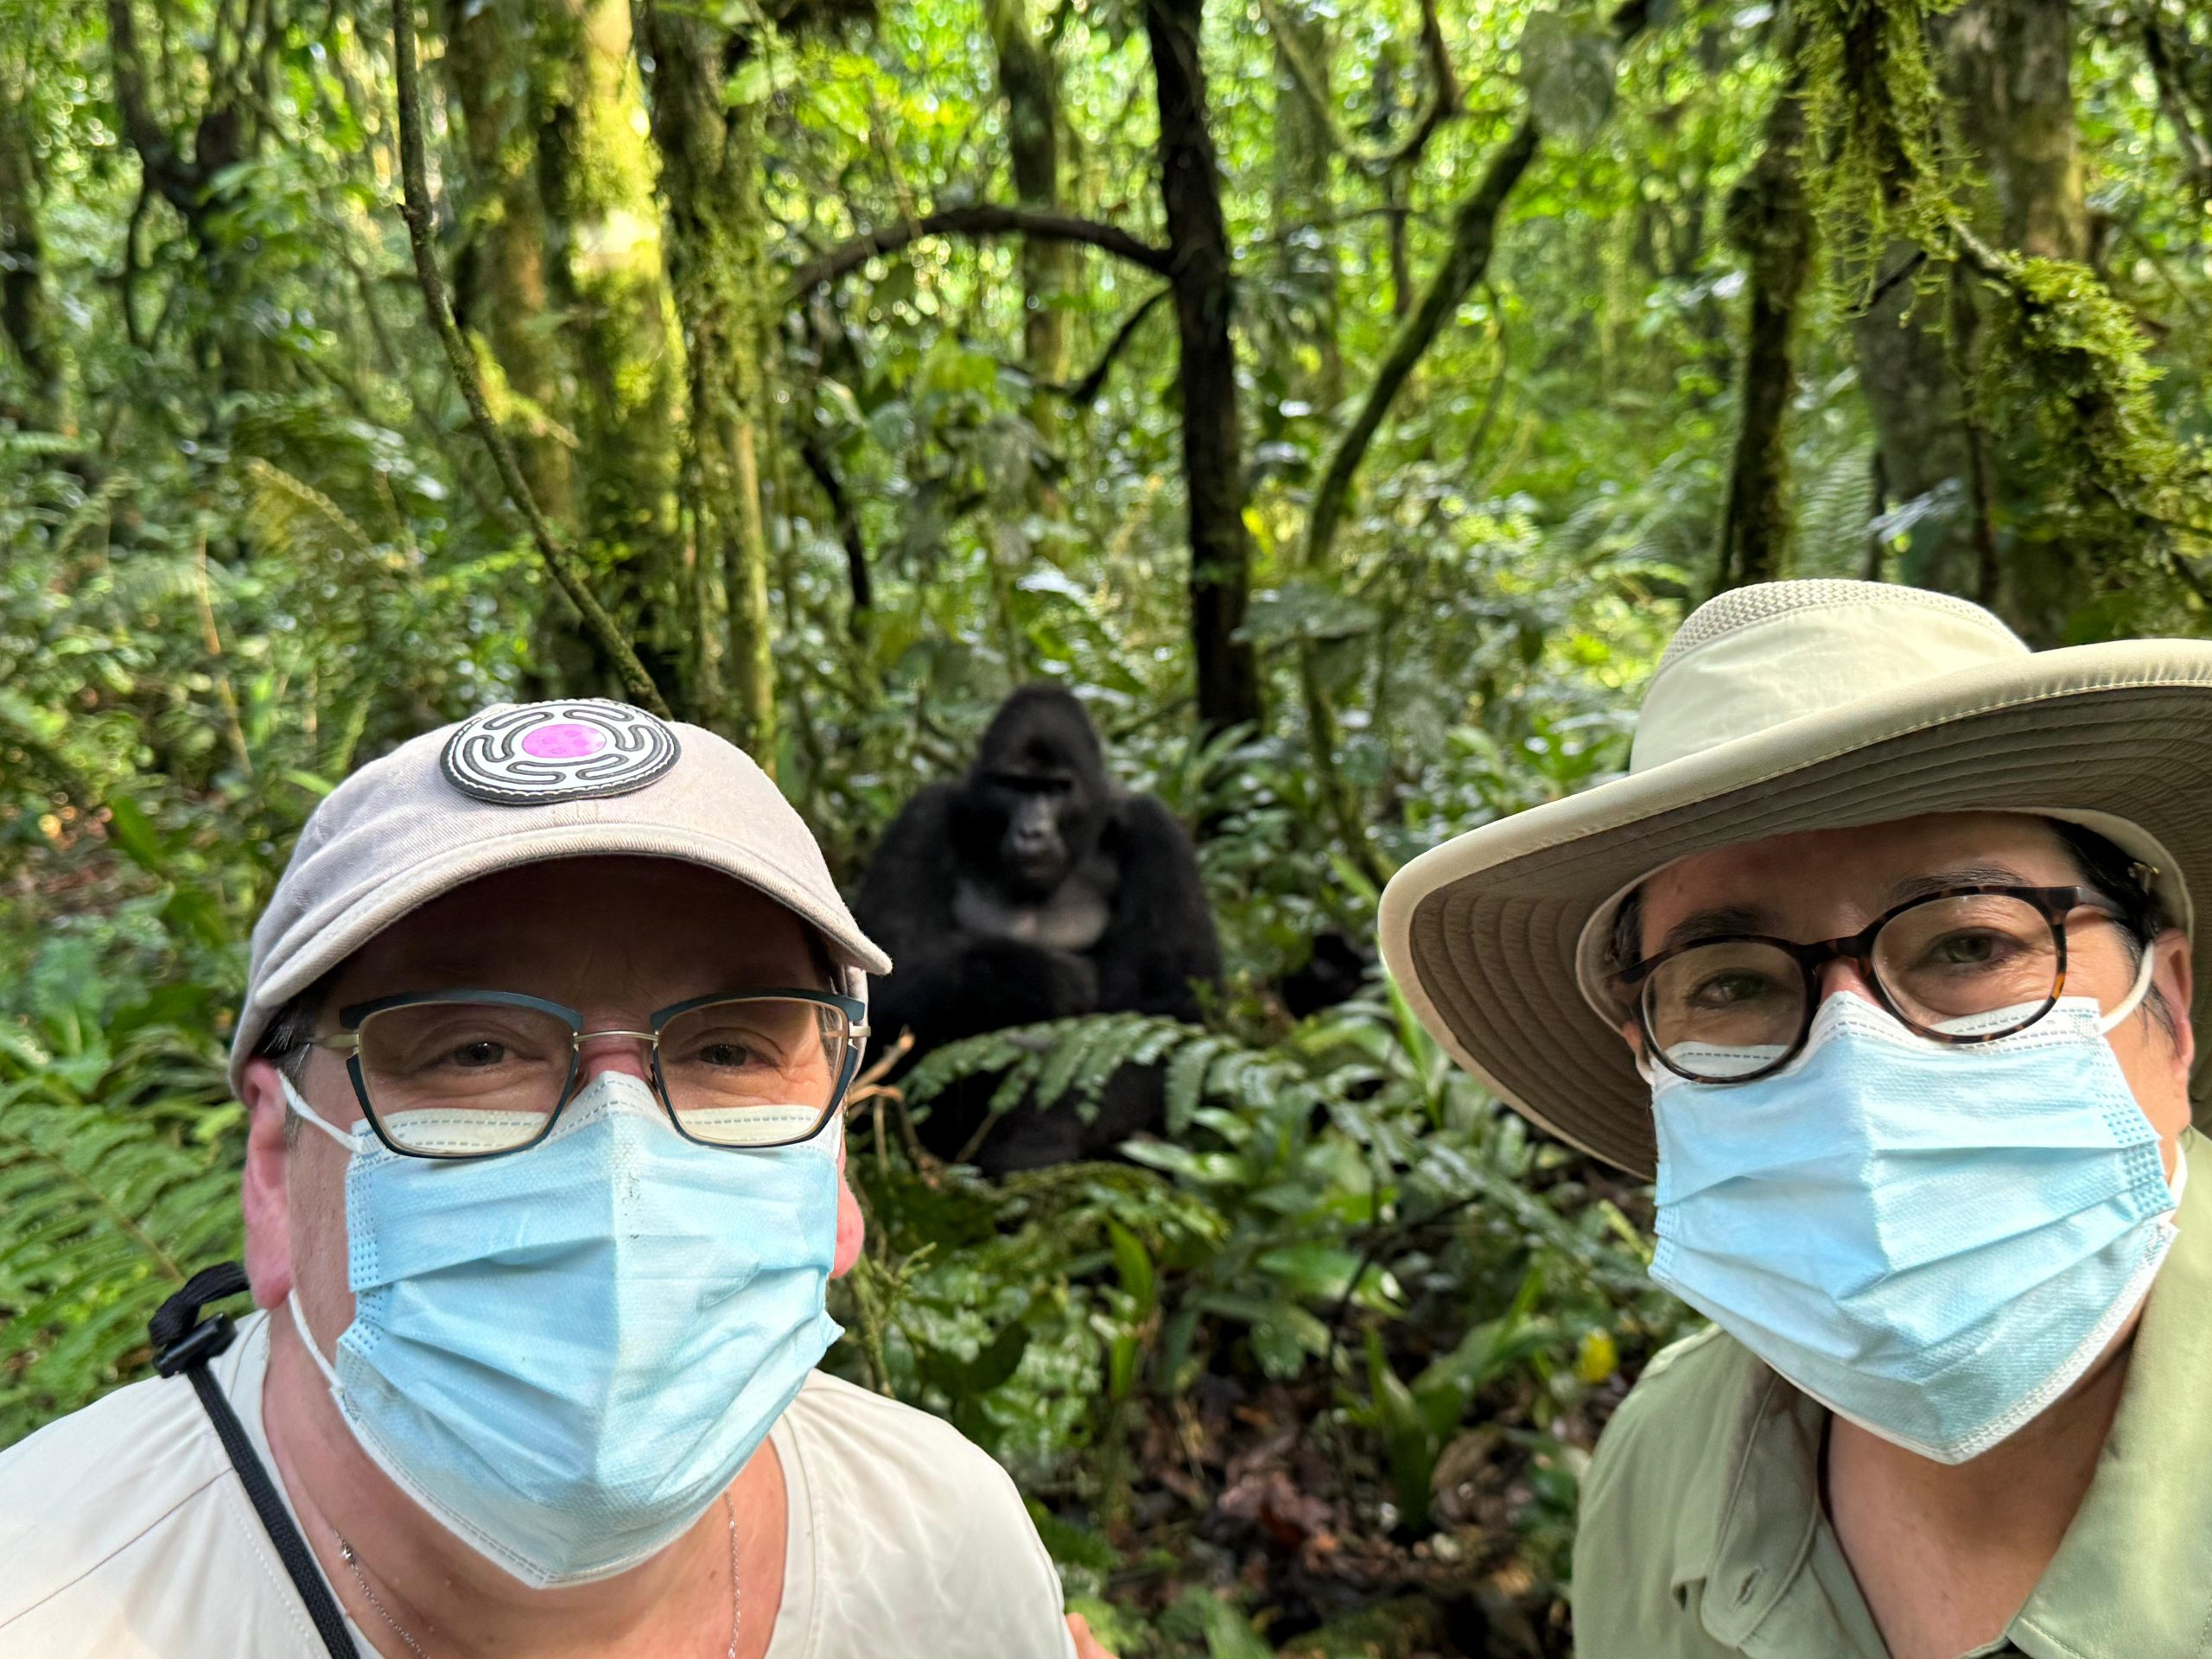
Once you find the gorilla family, you are allowed only one hour with them. This means every shot counts. The gorillas may move, sit in shadow, or face away, so anticipation is key.
Best Camera Equipment for Gorilla Trekking
Camera Bodies That Perform in Low Light
A camera with strong ISO performance is essential. Full-frame cameras handle noise better, especially when shooting above ISO 1600.
Mirrorless systems are ideal because they are lighter and offer silent shooting, which reduces disturbance to wildlife.
Lenses for Gorilla Photography
A versatile zoom lens such as 24–70mm or 70–200mm works best. Gorillas can be surprisingly close, so avoid overly long lenses that limit flexibility.
Prime lenses with wide apertures (f/1.8 or f/2.8) perform well in low light and help isolate subjects from the forest background.
Essential Accessories
Extra batteries are critical due to long trekking hours and cold forest conditions. A rain cover protects your gear from sudden showers, which are common in Bwindi.
A comfortable camera strap or harness allows easy movement through steep terrain.
Camera Settings for Gorilla Photography
Mastering ISO and Aperture
Low light forces you to increase ISO. Do not hesitate to shoot at ISO 1600–3200 or higher if needed. Modern cameras handle this well.
Use a wide aperture (f/2.8–f/4) to let in more light and create a soft background.
Shutter Speed for Movement
Gorillas may appear calm but often shift, feed, or interact. A shutter speed of at least 1/250 helps freeze motion. If lighting allows, go higher.
Autofocus and Shooting Mode
Continuous autofocus (AI Servo / AF-C) ensures your camera tracks movement. Burst mode helps capture subtle expressions and interactions.
Positioning and Composition Techniques
Work with Natural Light
Always observe where light is coming from. Position yourself so the gorilla’s face is lit rather than shadowed. Avoid shooting directly into strong backlight unless creating a silhouette.
Focus on Expression and Behavior
The best images come from storytelling—eye contact, grooming moments, or a silverback observing his group. These moments define successful gorilla trekking photography tips Uganda.
Keep Backgrounds Clean
The forest can be visually cluttered. Move slightly left or right to eliminate distractions like branches crossing the subject.
Trekking Strategy for Photographers
Pack Light but Smart
You will hike through steep and muddy terrain. Carry only essential gear to avoid fatigue. A heavy backpack reduces your ability to react quickly.
Hire a Porter
A porter can carry your gear and help you navigate difficult sections. This allows you to conserve energy for photography and stay stable when shooting.
Stay Ready at All Times
You may encounter gorillas suddenly. Keep your camera accessible, not buried in your bag.
Ethical Photography Guidelines
Maintain the Required Distance
Uganda Wildlife Authority requires a minimum distance of 7 meters from gorillas. Do not move closer for a better shot.
Avoid Flash Photography
Flash disturbs gorillas and is strictly prohibited. Always rely on natural light.
Respect Ranger Instructions
Rangers guide positioning and safety. Following their direction ensures both your safety and the well-being of the gorillas.
Best Time for Gorilla Photography in Uganda
Dry Season Advantages
The dry months (June–September and December–February) offer better trekking conditions and slightly improved lighting. Trails are less slippery, allowing more stable shooting.
Wet Season Opportunities
Rainy seasons bring lush greenery and dramatic atmosphere. While more challenging, they can produce unique and vibrant images.
Common Mistakes to Avoid
Overpacking Gear
Too much equipment slows you down and reduces mobility. Stick to one camera body and one or two lenses.
Ignoring Camera Settings
Auto mode struggles in forest conditions. Manual or aperture priority gives better control.
Focusing Only on Close-Ups
Wide shots showing the forest context can add depth and storytelling to your gallery.
Planning Your Gorilla Photography Safari
Choosing the Right Sector
Bwindi has four sectors—Buhoma, Ruhija, Rushaga, and Nkuringo—each offering different terrain and lighting conditions. Rushaga often provides slightly more open areas, while Nkuringo involves steeper hikes.
Booking Permits in Advance
Gorilla permits in Uganda cost around USD 800 and should be booked months ahead, especially in peak seasons.
Combining with Other Photography Destinations
You can extend your trip to include wildlife photography in Queen Elizabeth National Park or landscapes around Lake Bunyonyi for a complete portfolio.
Plan Your Safari
Gorilla trekking photography in Uganda is not just about equipment—it is about preparation, patience, and respect for wildlife. With the right approach and these gorilla trekking photography tips Uganda, you can capture powerful, once-in-a-lifetime images in one of Africa’s most iconic environments.