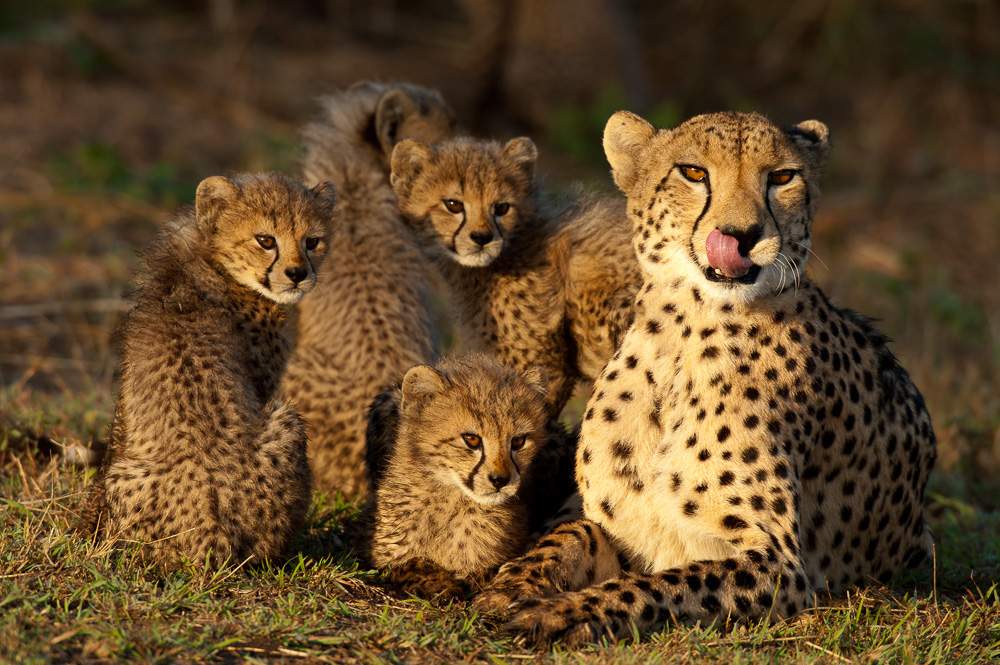
Essential Photography Tips for Kenya Safari
Equipment: What to Bring and Why
Camera Bodies and Lens Choice
Wildlife photography in Kenya demands a camera capable of handling two competing technical challenges simultaneously: fast, accurate autofocus tracking of moving subjects and clean image quality at the high ISO settings that low-light dawn and dusk drives require. Modern mirrorless systems from Sony, Nikon, and Canon handle both requirements better than any previous camera technology. Subject-tracking autofocus can lock onto a running cheetah and maintain focus through a burst of 20 frames per second at shutter speeds that freeze motion blur entirely. The Sony A9 III, Nikon Z9, and Canon EOS R3 represent the current top tier for this combination of speed and tracking accuracy. The previous generation of bodies — Sony A9 II, Nikon Z8, Canon R5 — perform nearly as well at significantly lower cost in the used market.
Lens selection for Kenya wildlife photography starts at 400mm focal length for adequate reach at the distances that most safari encounters occur — 20 to 60 metres from the vehicle. A 500mm prime or a 100–500mm telephoto zoom covers the majority of Kenya’s game drive sightings at good working distances. Adding a 1.4x teleconverter extends reach to 700mm for more distant encounters. The 70–200mm range covers environmental portraits where context matters more than subject size — a cheetah against the open Mara plains, an elephant family with Kilimanjaro behind. These images have a different visual character from tight telephoto portraits and give a complete edit more variety. Bringing both a telephoto zoom and a shorter focal length covers this range without requiring lens changes mid-sighting, when decisive moments pass in seconds.
Support: Beanbags, Window Mounts and Tripods
A beanbag draped over the vehicle’s window ledge provides the most practical camera support for safari photography. It eliminates the mirror and sensor vibration that in-body image stabilisation must work against at every hand-held shot. The beanbag’s contact with the window ledge absorbs small vibrations from the vehicle’s engine and the guide’s occasional slight movement. This produces a stability benefit measurable in image sharpness at 400mm and above — the difference between a sharp frame and a slightly soft one that falls apart when cropped or printed large. Beanbags cost less than USD 40, weigh under one kilogram, and travel in carry-on luggage. They represent the highest return-on-investment photographic accessory for any Kenya safari trip without exception.
Window mounts — clamp-on supports that attach to the vehicle’s window frame — provide a sturdier platform than a beanbag for very long lenses or video work. A 600mm f/4 prime with a heavy teleconverter benefits meaningfully from a window mount’s greater rigidity. Guides at dedicated photography camps typically keep window mount systems available without prior notice. Tripods are impractical in moving safari vehicles and unnecessary when beanbags provide adequate support for still photography. They suit photographers planning to disembark for walking safari photography but add significant weight to luggage already carrying multiple camera bodies and lenses.
Camera Settings for Different Safari Scenarios
Action Photography: Predator Hunts and River Crossings
Fast action photography in Kenya — a cheetah hunt, a river crossing, a lion at a kill — requires shutter speed prioritisation above all other settings. Motion blur at these speeds is irreversible in post-processing, while exposure errors are correctable within a reasonable range. A minimum shutter speed of 1/2000 second freezes the motion of a galloping wildebeest or running cheetah without blur. A setting of 1/3200 second and above provides additional margin for the most extreme movement speeds. Setting the camera in shutter priority mode with automatic ISO lets the camera maintain this minimum shutter speed across the full range of changing light conditions during a two-hour early morning drive without requiring constant manual adjustment.
Continuous autofocus tracking mode — called AI Servo on Canon, Continuous-AF on Nikon, and AF-C on Sony — activates the camera’s subject-tracking system and should be the default autofocus setting for any drive where moving subjects are expected. Modern cameras with animal-recognition autofocus will lock onto a cheetah’s eye as the primary focus point and track it through frame-filling bursts even when the animal moves at high speed or is partially hidden by grass. Activating the camera’s fastest burst rate — 15 to 30 frames per second depending on the body — during active sequences captures the peak moment of a leap, a turn, or an open-mouthed call that a slower burst rate setting would miss entirely.
Portrait Photography: Lions, Elephants and Stationary Subjects
Portrait photography of stationary subjects — a lion on a kopje, an elephant family at a waterhole, a leopard in a tree — rewards a completely different technical approach from action photography. Slower shutter speeds of 1/250 to 1/500 second allow smaller apertures that extend depth of field to keep more of the subject in focus when face and body occupy a similar focal plane. A single autofocus point or small AF zone placed precisely on the nearest eye produces sharper portraits than area AF modes that may choose a focus point on the shoulder or ear. Shooting at the largest aperture the lens allows — f/4, f/5.6, or f/6.3 depending on the lens — produces background separation that lifts the subject from its environment and creates the visual quality that distinguishes professional wildlife portraits from snapshots.
The quality of light at any given moment affects portrait results more than any camera setting decision. The twenty-minute window immediately after sunrise and immediately before sunset produces warm, low-angle light that wraps around subjects and eliminates the harsh shadows that midday overhead sun creates across the same scene. Planning drives around these light windows rather than wildlife density alone produces qualitatively better portrait photography with every camera and lens combination. A technically imperfect shot in perfect light consistently beats a technically perfect shot in flat midday light for visual impact and emotional quality. Asking your guide to position the vehicle so that the sun angle illuminates the subject’s face rather than backlighting it from behind is the single most impactful photographic instruction you can give during a drive.
In-Field Behaviour and Sighting Etiquette
Working With Your Guide for Better Images
The most effective photography safaris happen when photographers communicate their specific needs to guides at the beginning of each drive rather than assuming the guide will intuit what positions and timings produce good photographs. Telling the guide you are targeting eye-level shots of ground-dwelling predators, or that you need the sun on the left side of the subject, or that you want extended time at active sightings without moving on, changes the guide’s driving behaviour in ways that accumulate to significantly better images across a full day. Guides who receive no such preferences default to behaviours that suit the average guest — moving when the action slows, positioning for visibility rather than light angle, prioritising park coverage over depth at specific sightings.
Remaining still and silent in the vehicle during active sightings improves both the guide’s ability to hear sounds that indicate predator movement and the subject animal’s comfort at close approach. Predators that relax with the vehicle continue their natural behaviour — hunting, feeding, playing with cubs. Those made nervous by vehicle movement or noise alter their behaviour in ways that reduce both observation quality and photographic opportunity. Switching camera shutters to silent electronic shutter mode on mirrorless cameras eliminates the audible click that SLR mirrors and focal-plane shutters produce, avoiding behavioural changes in sound-sensitive subjects like leopards and serval cats at very close distances.
Post-Processing and Editing Kenya Wildlife Images
Getting the Best from Raw Files
Raw File Processing for Safari Images
Shooting in Raw format rather than JPEG captures the full dynamic range of the camera sensor and allows post-processing decisions about exposure, colour temperature, and detail recovery that JPEG compression eliminates at the point of capture. A Raw file of an elephant silhouetted against a golden sunrise sky allows recovering shadow detail in the elephant’s body and reducing highlight intensity in the sky independently, balancing the extreme contrast that automatic JPEG processing would render as either a blown sky or a featureless dark silhouette. This recovery latitude makes Raw format essential for serious wildlife photography and creates an edit quality floor that even technically imperfect exposures can clear when the light, subject, and moment align.
Adobe Lightroom remains the dominant post-processing tool for wildlife photographers at all levels. It handles the cataloguing, culling, and editing workflow of a week’s Kenya trip — which might produce 5,000 to 15,000 raw files — more efficiently than any alternative. The masking tools introduced in Lightroom 2022 allow subject-specific adjustments — brightening an elephant’s skin independently of the sky behind it, sharpening a cheetah’s eye while leaving the soft background undisturbed — that previously required Photoshop layer work and now complete in seconds with AI-assisted selection. Developing a consistent editing preset that applies your preferred contrast curve, colour treatment, and sharpening to raw files on import removes hundreds of repetitive manual adjustments from the editing workflow.
Plan Your Safari
A photography safari benefits from pre-trip equipment advice, in-field technique guidance, and camp selection that combines specialist photography guides with off-road access and appropriate light conditions for the subjects you most want to photograph. African Wild Trekkers designs photography safaris with dedicated photography guides, vehicle modifications for camera support, and camp selection focused on the species and light conditions that match your photographic goals.
The package covers accommodation at photography-friendly camps, specialist guide briefings on your equipment and goals before each drive, park and conservancy fees, internal flights, and evening image review sessions where camps offer this in their photography programme. Advice on equipment to bring and pre-trip camera preparation is provided before departure.
Contact African Wild Trekkers at africanwildtrekkers.com/contact with your photography goals and travel dates and we will design your Kenya photography safari within 24 hours.